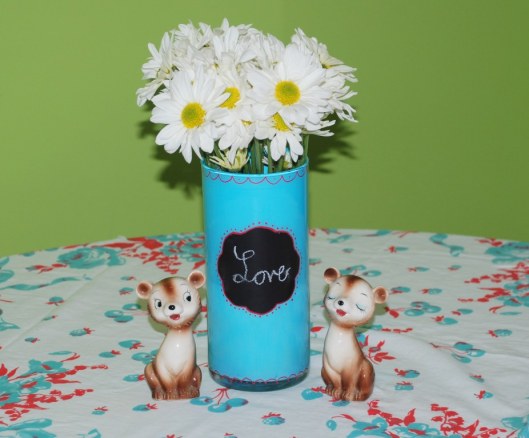
14 Days of Love- “Love” Chalkboard Vase

Well I can’t believe I did this, but somehow I lost the pictures of the steps to making this project, so, I will do my best to explain it to you. DIY magazine had a very similar project in their latest issue as well, without the chalkboard paint.
Supplies:
*Vase
*Glass paint, make sure it’s at least hand washable
*Sharpie paint pen
*Chalkboard paint
*Stencil(optional)
Step 1: Make sure your glass is clean and dry before you paint. Squeeze a small amount of paint into the inside bottom of your vase. Now, swirl the vase in your hand coating the inside of the vase with paint. I put mine upside down over a paper plate for a few minutes to coat it a little more evenly, then I wiped the excess off the rim with a damp paper towel. Let dry…
Step 2: You can either free hand or use a stencil for the “frame” area for the chalkboard paint. I used a stencil and just taped it to the front where I wanted it. Follow the instructions on your chalkboard paint. Mine said to paint one coat horizontally, let dry for an hour, and then paint the second coat vertically. Let dry…
Step 3: Decorate with the sharpie. This was my first time using a sharpie paint pen, and I have to say, it’s fantastic! I plan on getting more. Freestyle decorate on the outside of your vase with your sharpie paint pen. I used scalloped designs on the top and bottom of the vase and outlined my chalkboard area. Have fun with it!
Step 4: Get your chalk out and write your own messege for your sweetie. Add your choice of flowers, and your done.
My hubbie and I always make a really nice dinner at home for valentine’s day, since we don’t like crowded restaurants. This year I’m using this sweet little vase for the centerpiece for our Valentine’s dinner table. A+D= Love……, Cheesy, but oh so true!


